Rock climbing is often portrayed in the media as a reckless activity by focusing on the outliers of the sport and bold first ascensionists. In truth, rock climbing does involve inherent risk of injury or death. But the history of the sport can also be told through multiple safety innovations that have allowed climbing to become increasingly accessible and popular. In our first article on safety innovations, we discussed the evolution of belay devices and techniques. In this article, we will examine the devices that keep climbers secured to the wall and protect against deadly falls.
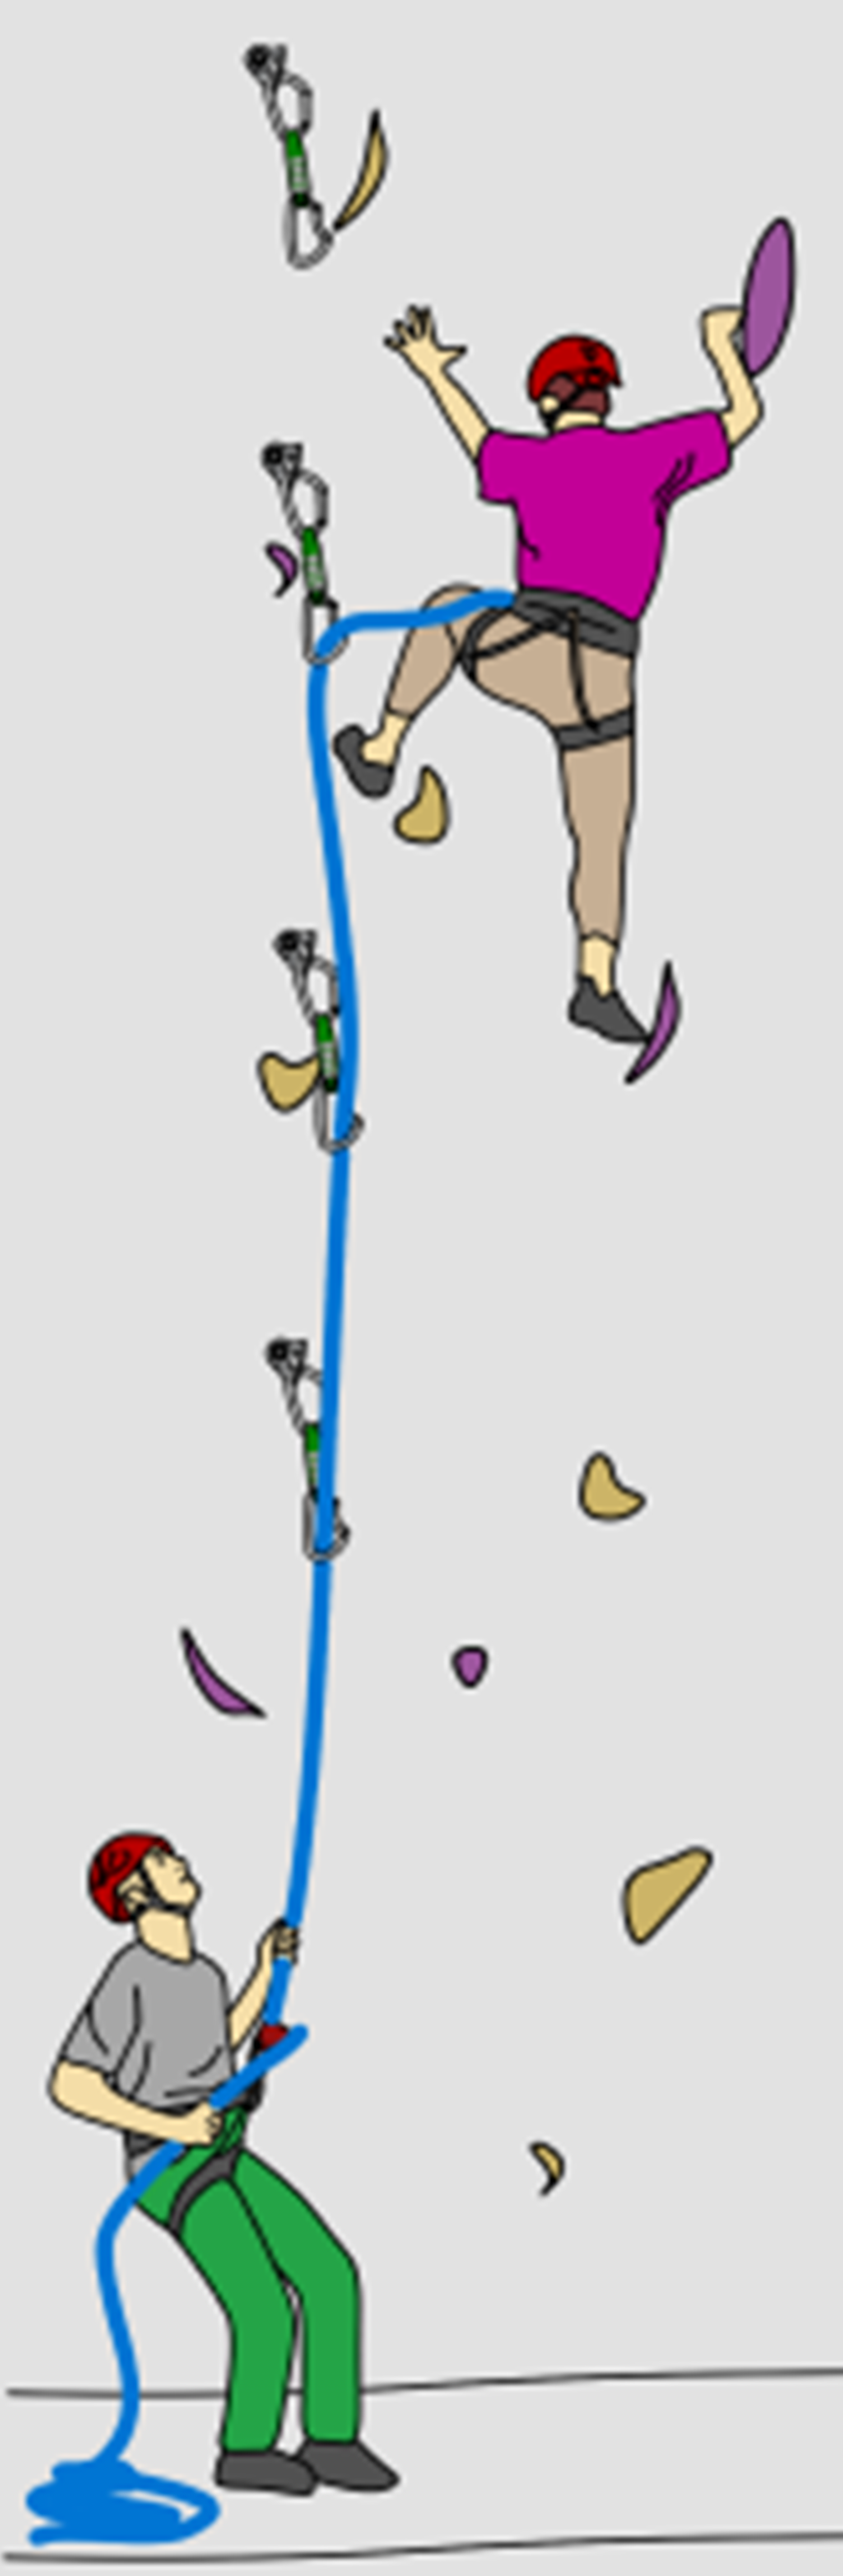
Lead climber clipping protection, VDiff Climbing.
Rock protection refers to an array of devices or techniques by which climbers can attach themselves to the rock to shorten the distance of a fall. As we discussed in the previous article, the lead climber must set protection as they climb. If a fall were to occur, they will fall until they are caught by a combination of the belayer and the last piece of protection. It is important for the leader to set frequent protection as they will fall at least twice the distance between themselves and the last piece of protection. This means if a fall occurs 10 feet above the last piece of protection, they will fall 20 feet before being caught. In practice this distance is even more due to slack in the system and rope stretch. Climbers refer to the distance between them and the last piece of protection as runout. Learning how to place protection and manage runout is one of the most crucial components of learning to lead climb. Instruction on placement of protection is beyond the scope of this article and should only be done under the supervision of a qualified guide.
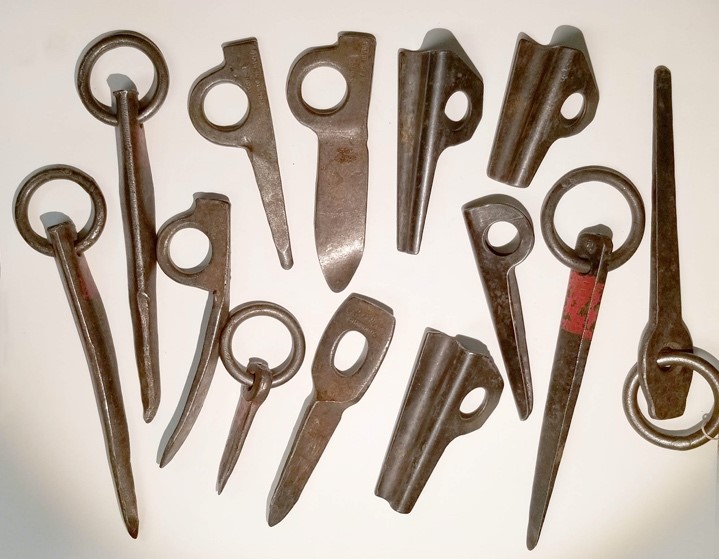
Historic pitons (left), American Alpine Club. Modern pitons (right), Black Diamond Equipment.
Hammer Time
At first, climbers were limited to using natural features as protection. This could mean wrapping the rope around rock horns or other similar features. In ideal circumstances, this could result in adequate protection. However, in practice, these features often do not sufficiently secure the rope and may not be available to protect critical portions of the climb. The first major innovation was the invention of pitons in the late 1800s. Pitons are metal spikes with a ring or hole for attaching the rope. Using a hammer, a climber can hammer the piton into a crack in the rock. Pitons were initially made of soft iron/steel with a ring. This allowed for the metal to conform to the crack as it was hammered in. This innovation improved security as climbers could place a piton wherever a crack in the rock existed, significantly expanding the options for placement of protection.
However, it soon became apparent that the ring was a weak point and susceptible to breaking or failing. The first refinement of the piton occurred in the 1910s and is credited to the Austrian climber Hans Fiechtl. The ring was eliminated and the piton was forged with a large hole. This increased the strength of the piton and reduced failures. Even with this change, a problem with pitons remained – while the soft metals aided in increasing the security of the piton, placement permanently deformed the piton and made it unremovable. This led to two major consequences: popular routes became littered with rusty pitons and climbers had to carry as many pitons as they thought they would need on the route since they were not reusable. This imposed limitations on route length as climbers could only carry so much weight. The fix to this problem was to forge pitons from harder steel, as this allowed for the removal and reuse of pitons. These new, harder pitons were pioneered in Yosemite Valley in the 1940s and 1950s by John Salathé and further refined by Yvon Chouinard in the 1960s. Since then, additional sizes and shapes have been created but the basics of the piton have changed little. Pitons fell out of widespread use in the 1970s with the clean climbing revolution, which is discussed later in the article. However, they do retain utility today. Pitons remain an important tool for aid climbing and are often taken for big, remote alpine climbs.
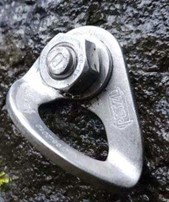
Climbing bolt with hangar, HowNot2.
Perfect for hanging out
Bolts are a common site at climbing areas and may even be found on remote routes. Despite the ubiquity, bolts have a complex history within the sport. While pitons and other types of protection work well for certain sections of climbs, they cannot be placed in sections of wall without cracks. To add safety to these otherwise unprotectable sections, climbers began to drill directly into the rock and place bolts with metal hangars with which one could attach the rope with a carabiner. The two-piece configuration is colloquially referred to as a “bolt”. The use of bolts began to increase in the 1950s but skyrocketed in the 1980s. In the earlier days of the sport, climbers sought the easiest way to the top. But as the skill and strength of climbers increased, many began to turn their attention to previously unclimbed and unprotectable walls. Bolting of these walls that were specifically chosen for their difficulty gave rise to what is now known as sport climbing. This is now seen as an acceptable practice in high-traffic areas specifically developed as sport climbing destinations. However, debate continues on whether bolts should be added to older climbing routes.
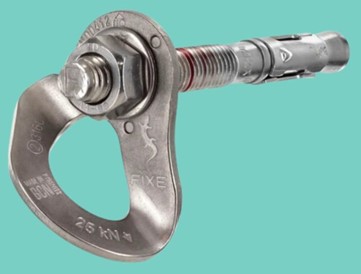
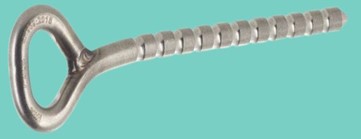
Expansion bolt (above) and glue-in bolt (below), Climbing House.
Modern bolts, placed appropriately, are incredibly strong. Bolts are seen as permanent additions to the wall and bolts that were placed in the 1980s or 1990s remain in place in many locations. However, many of these bolts are past their life cycle and bolting standards have evolved. This has led to re-bolting efforts in many parts of the country. It is important to inspect any bolt before trusting it. The two major categories are expansion bolts and glue-in bolts. Both types of bolts require first drilling into the rock.
In the case of expansion bolts, the bolt is placed into the hole and then tightened. Tightening of the bolt causes the sleeve of the bolt to expand inside the hole. The resulting friction creates the holding power. Several different types of expansion bolts exist and can be used in a variety of rock types. Expansion bolts are ready for use immediately after placing. Glue-in bolts rely on glue for their strength. After drilling and cleaning the hole, specialized glue is used to fill the hole and the bolt is then inserted. Glue-in bolts must be allowed to cure before they are ready for use. Glue-in bolts are popular for placement in soft rock or areas with significant corrosion concern. In addition to use as running protection on sport climbs, bolts are popular to use as belay or rappel anchors even on remote climbs due to the increased security they provide.
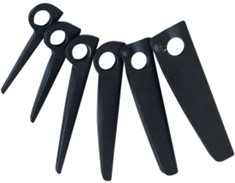
Historic nut (left), Needle Sports. Modern nuts (right), Black Diamond Equipment.
Did you just say pebbles?
Properly placed pitons and bolts offer sufficient protection. Combined they allowed climbers to accomplish impressive ascents. However, they both suffer from a problem – they permanently disfigure the rock. Bolts require drilling holes in the rock and repeated piton placement leaves what is known as piton scars. As climbing became increasingly popular, climbers became concerned with preserving the rock in as pristine shape as possible. In the early 1970s these growing concerns combined with new technology to create what came to be known as the clean climbing revolution. This change in climbing ethics encouraged protection methods that do not damage the rock and are not permanently fixed.
The invention of chockstones allowed for this change in ethic. The use of chockstones originates with British climbers in the 1920s. Climbers began to carry small rocks for use as protection on climbs. The small rocks, called pebbles, could be slotted into cracks and then slung with a small piece of cord to allow for attachment of the main climbing rope. By the 1950s, the use of small stones for this purpose had fallen out of favor when climbers realized that using machine nuts worked better. The hole in the nut allowed the cord to be pre-slung and the shape of the nut allowed for more consistent placements. Throughout the 1960s and 1970s, climbers continued to innovate on this concept eventually arriving at its modern form. Even as this technology evolved, the name “nut” stuck and remains the most popular name for these devices. They are also known as “stoppers” or “wires” in certain regions.
Example of a well placed nut, REI.
Modern nuts come in a large variety of shapes and sizes to allow options for placement in all types of cracks during a climb. Depending on the length of the climb, it is typical for climbers to carry between 10-20 nuts. Nuts are placed by slotting them into cracks and work best where there is a taper in the crack. If a fall happens, a properly placed nut will resist being pulled through the crack and will arrest the fall. Nuts fall into the category of “passive” protection. This refers to the fact that they have no moving parts and work by using simple friction. Other types of passive protection also exist. Two other commonly used devices are hexes and tricams. These devices fit well in certain types of cracks and can also be used as “active” protection, as explained in the next section.
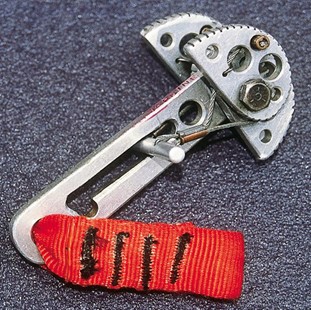
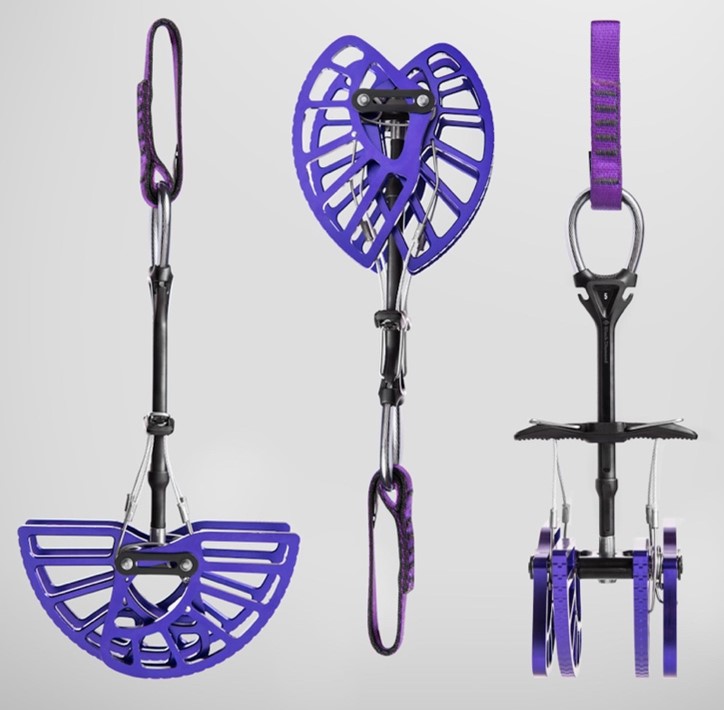
Historic cam (left), Gripped. Modern cam (right), Black Diamond Equipment.
A little help from my friends
Nuts work incredibly well in many circumstances and remain a staple of the standard trad rack even today. However, they do not work in cracks that are relatively parallel and only have reliable holding power in one direction. The solution to this problem came in the 1970s with the invention of spring-loaded camming devices (SLCDs), which are now commonly simply called cams. The first cams for public use became available in 1978 thanks to the climber Ray Jardine. His refinement of prior designs produced the basis of the modern cam. Initially called Friends, these devices exploded in popularity since they allowed for reliable protection of previously unprotectable sections of climbs.
Cams derive their holding power from the angle of the lobes. A cam is properly placed by ensuring all lobes have adequate contact with the rock and are ideally in the middle of the range of the cam. A fall will then transfer force up the stem and will be transferred into the rock by the lobes. Due to the angle of the cam lobes, more force on the cam increases the amount of friction and holding power. This allows cams to retain holding power even in parallel cracks with very few features. They also can tolerate a pull in multiple directions, unlike nuts. Thus, cams have come to be known as “active” protection since they rely on moving parts. Since their introduction, the lobes of the cams have changed little but several innovations have improved on the design of other parts. Cams now have a flexible stem that ensures they will maintain strength even when loaded over an edge. A double axle was also introduced which increases the range of the lobes and allows for more variety of placement options. Modern cams now come in a large variety of sizes and shapes significantly increasing their utility. It is common for climbers to carry 10-20 cams of different sizes to ensure adequate protection options.
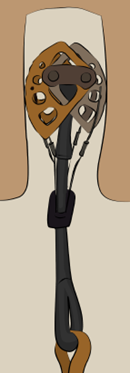
Properly placed cam, VDiff Climbing.
Climbers today have the advantage of many protection options. They are able to tailor their kit to adapt to the demands of climbing in many different settings. In addition to these now time-tested designs, modern gear is made from high quality materials and meets rigorous engineering standards. Despite this, climbing accidents still occur. For any type of protection to have adequate holding power, it must be placed properly. Each individual climber must seek proper instruction in the protection techniques they plan on using before entrusting their lives and the lives of their partners to these devices. It also remains critical for climbers to exercise good judgment and manage risk appropriately to stay safe while climbing.