In this second installment of WildMed Simulation Series (from the WMS Student/Resident Education Committee), Marc and Justin ask moulage maestros Teal and Lara their best tips for creating cinema-quality.
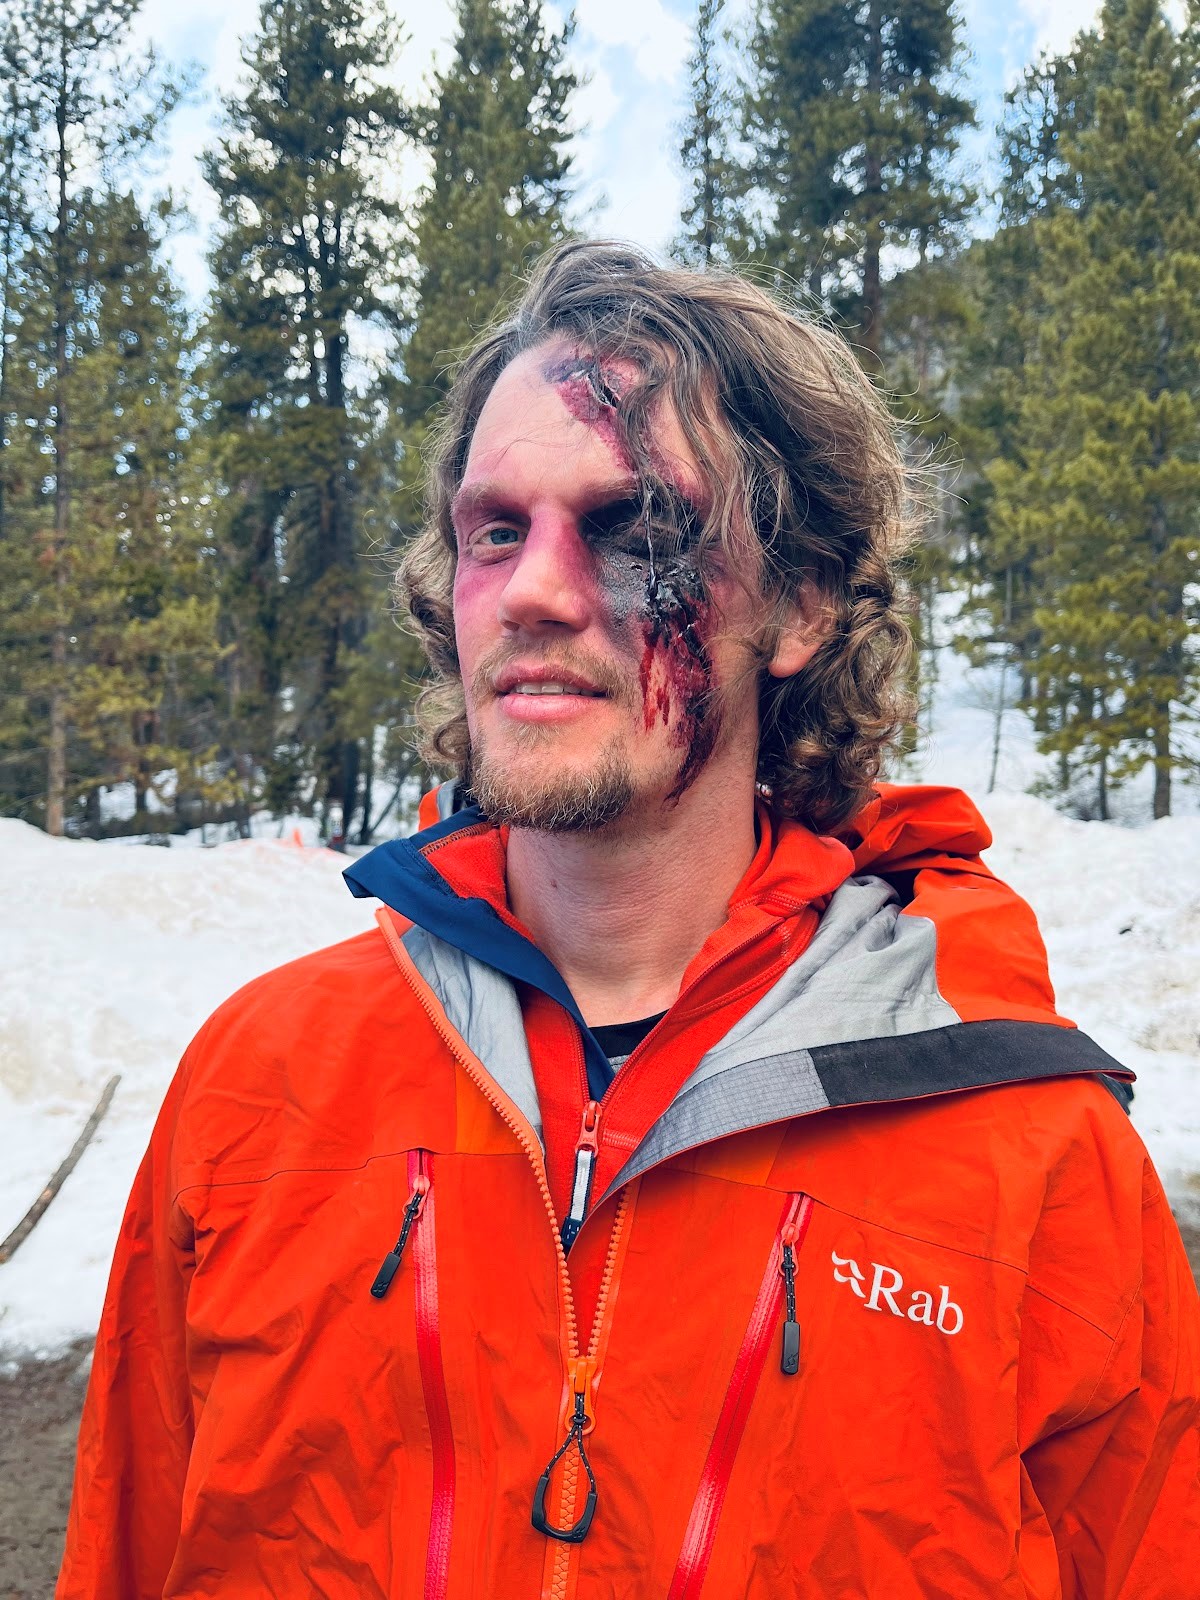
Fantastic moulage or devastating craniofacial injury? Hard to say. (Photo: Lara Phillips)
Scenarios and simulations are essential components of wilderness medicine education. Whether teaching a specific treatment intervention or a concept such as patient assessment, realism is key to engaging your audience. While we may be able to describe the setting, provide prompts for simulated victims and participants, and supply vital signs and exam findings, this can only go so far to create a convincing simulation. Search and rescue personnel, outdoor instructors, and medical responders must practice skills in environments that mimic real-life situations. By creating verisimilar injuries, trainees can gain better hands-on experience that mirrors the challenges they will face in the field, ensuring they are better prepared for real-world emergencies.
High quality moulage (pronounced like “moo-lodge”, from the French for molding/casting) refers to creating realistic looking injuries and conditions on mannequins or simulated victims. Moulage also includes utilizing realistic clothing and equipment appropriate for specific scenarios. For instance, a scenario involving a burn can include realistic burn wounds as well as burnt clothing, or realistic blood and wounds with shredded clothing and gear for an animal attack scenario. This article will provide tips and tricks to implement high yield moulage techniques in your training simulations.
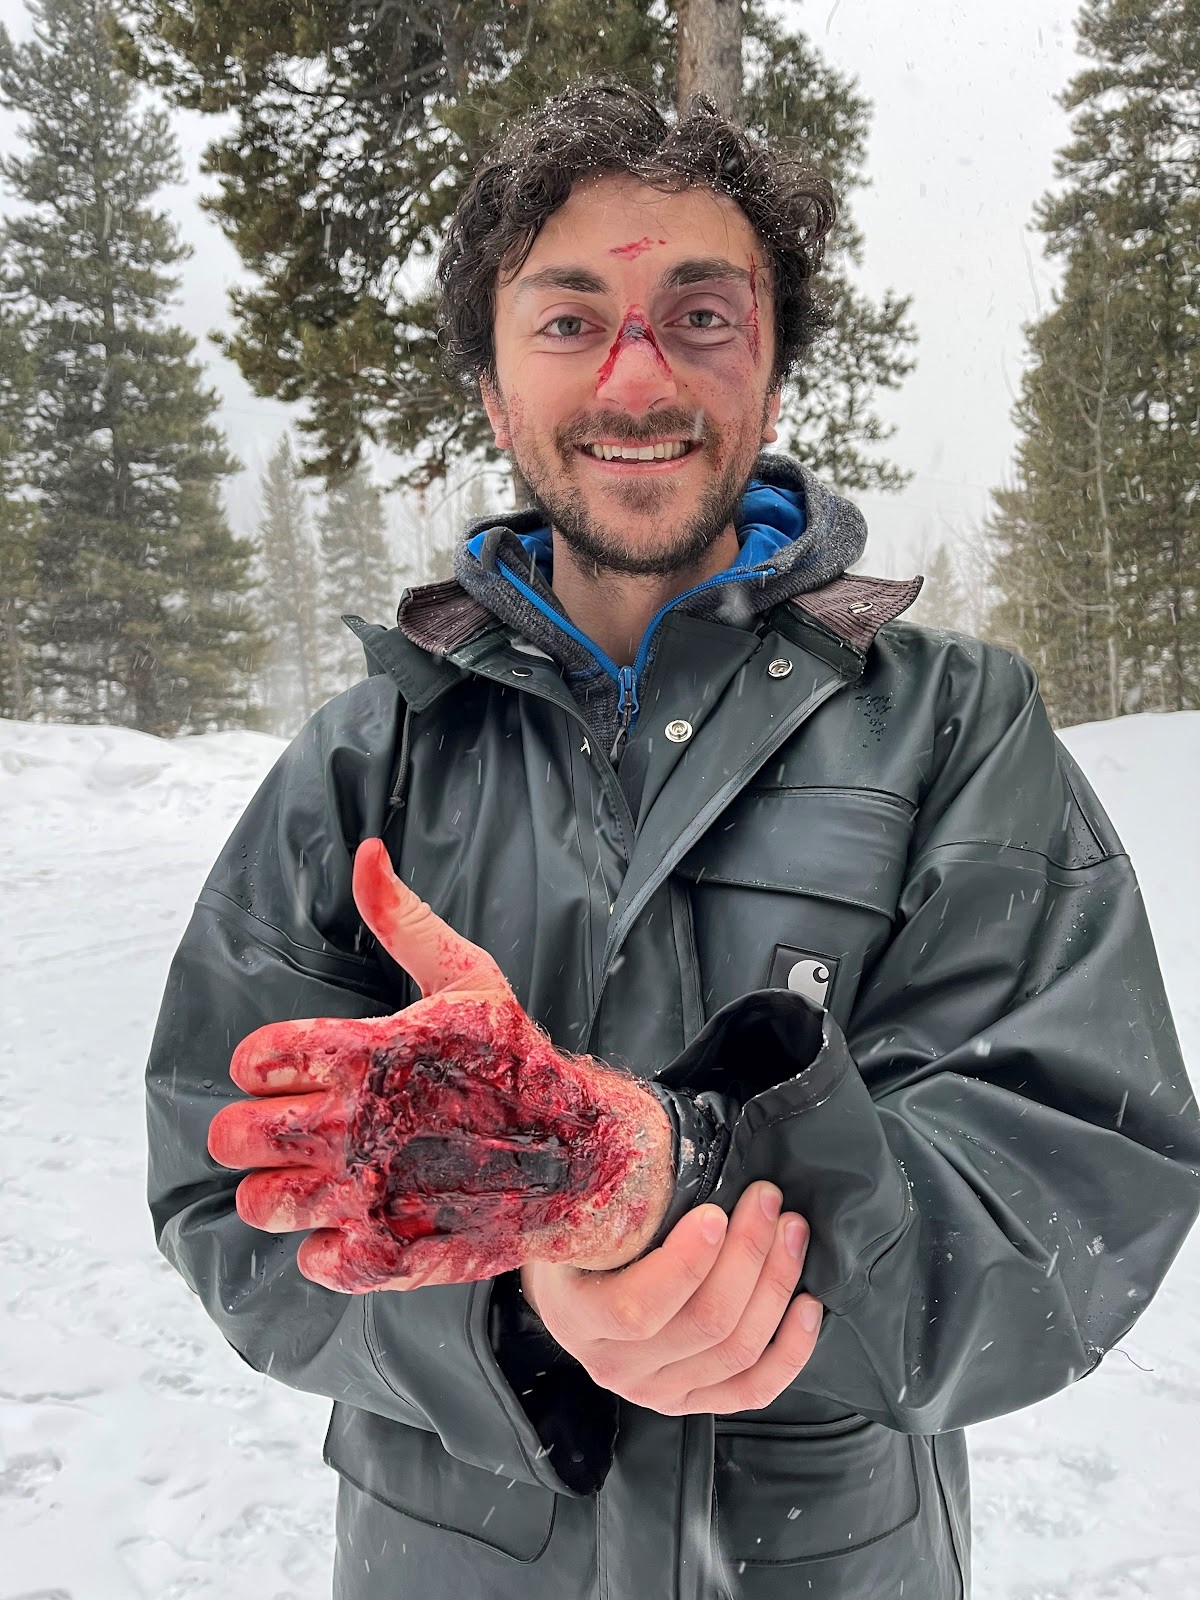
Student demonstrating a hand injury. Hopefully he’s not a lefty. (Photo: Lara Phillips)
Basic moulage equipment:
- A makeup wheel; ideally one with plenty of shades of red and blue and applicators. This is the most important piece of equipment and very portable into backcountry settings!
- Glycerin-based blood gel that can be diluted or thickened to effect (may stain clothes!)
- Corn syrup-based liquid blood for those bigger hemorrhages (comes in mint flavor!)
- Consider liquid latex (with applicator) to create an adhesive base to sculpt more complex wounds (check for latex allergies!)
- Consider modeling wax to create some relief and a three-dimensional quality to your wound. Apply petroleum jelly to your fingertips beforehand to prevent the wax from sticking to you.
- Consider Halloween temporary tattoos that come in a variety of different types of wounds. They can be applied quickly and enhanced with additional makeup or blood. Relatively inexpensive, very portable, and easy to apply although not as durable.
General moulage tips:
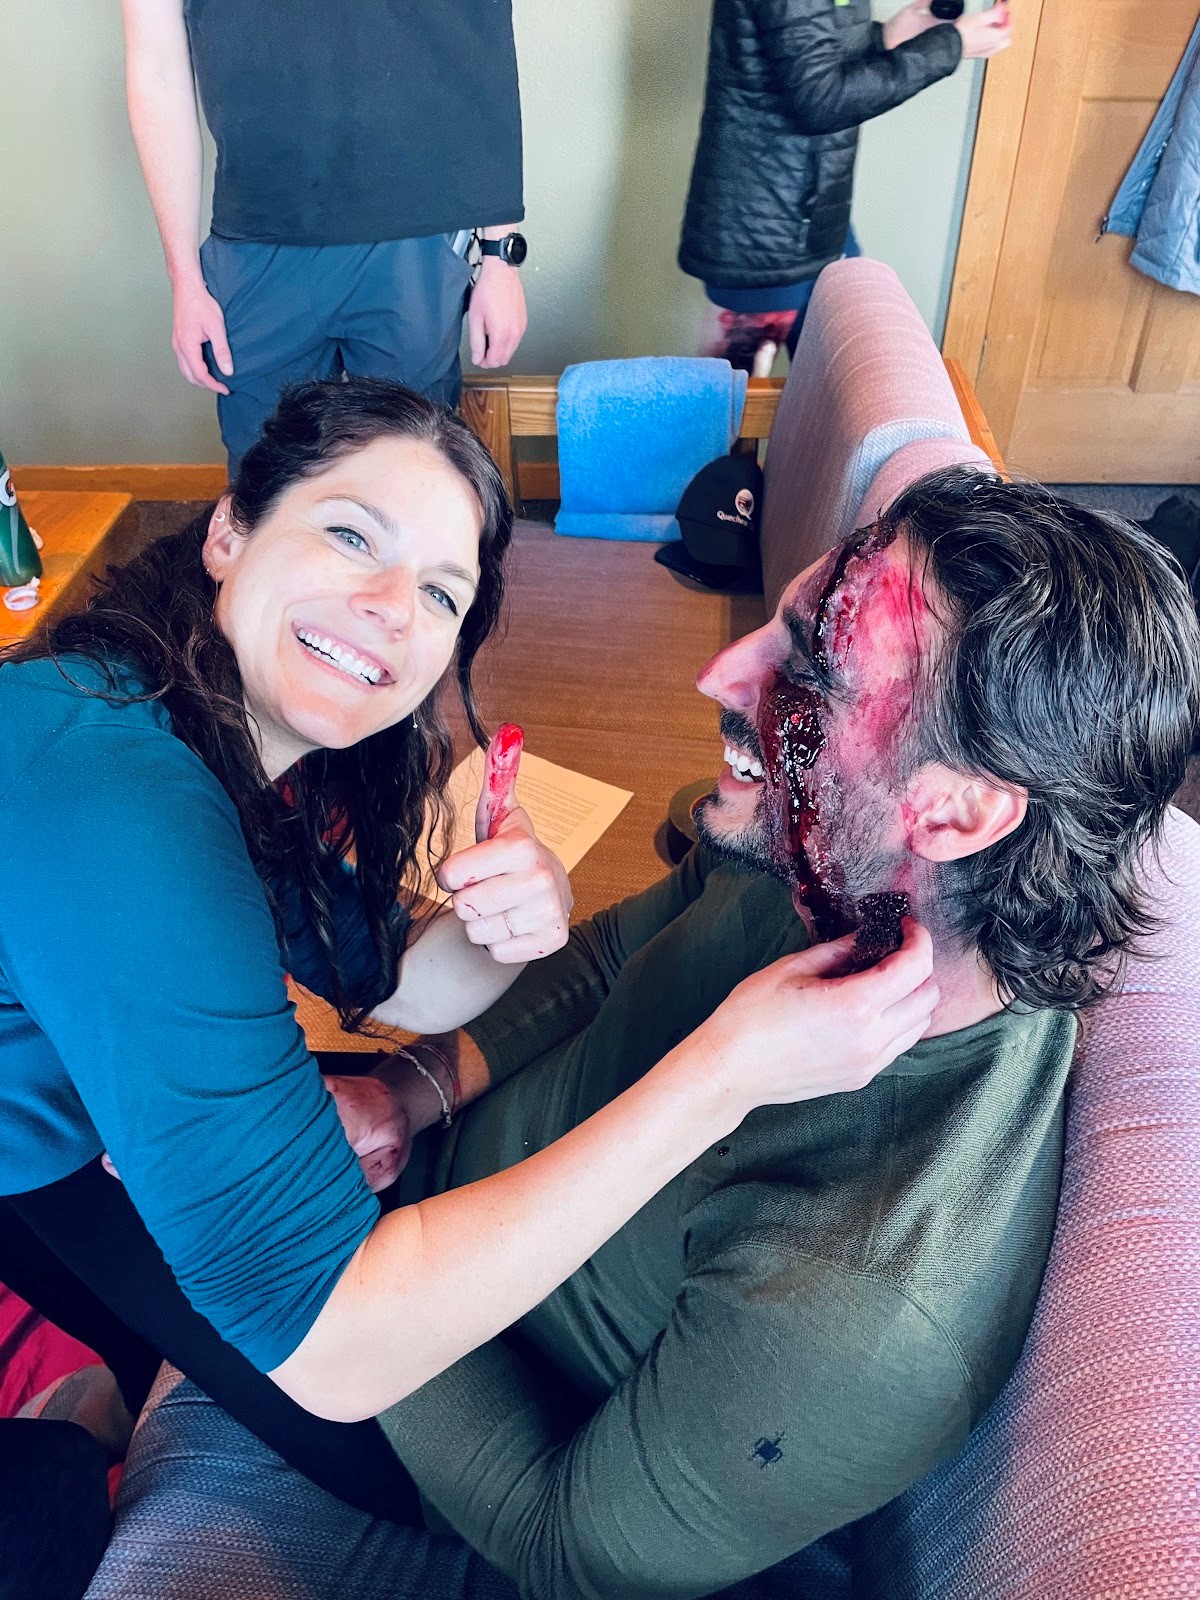
Dr. Lara Phillips practicing her skills on a smiling student. (Lara Phillips)
When applying makeup to the hairline or eyebrow, apply petroleum jelly to these areas to make for easier cleanup afterwards.
- Have source photos of actual injuries to use as inspiration.
- Bring spare clothes that are ok to be stained, ripped, or wet.
- Be creative and practice on your friends!
Step-by-step guides to different injury techniques:
Complex lacerations
Complex laceration with raised margins and plenty of blood. (Photo: Teal Harbin)
- Take a small amount of modeling wax and roll it into a cylindrical shape to the size desired and place it onto the subject’s skin. Consider appying a base of liquid latex (ask about allergies!) or skin adhesive before placing the molding wax to allow for better adhesion.
- Use a tool like the small spatula-shaped metal tools in makeup kits to flatten the sides of the laceration and smooth onto the skin.
- Using a narrow object (toothpick, butter knife), create an indent in the center of the molding wax to create the actual laceration defect.
- Color the base of the laceration in black.
- Use a darker red color along the edge of the laceration.
- Blend in a bruising or erythema color along the sides of the laceration depending on how you want the injury to look.
- Add blood gel inside the laceration and a more liquid blood around the wound using a stippling sponge.
Burn injuries
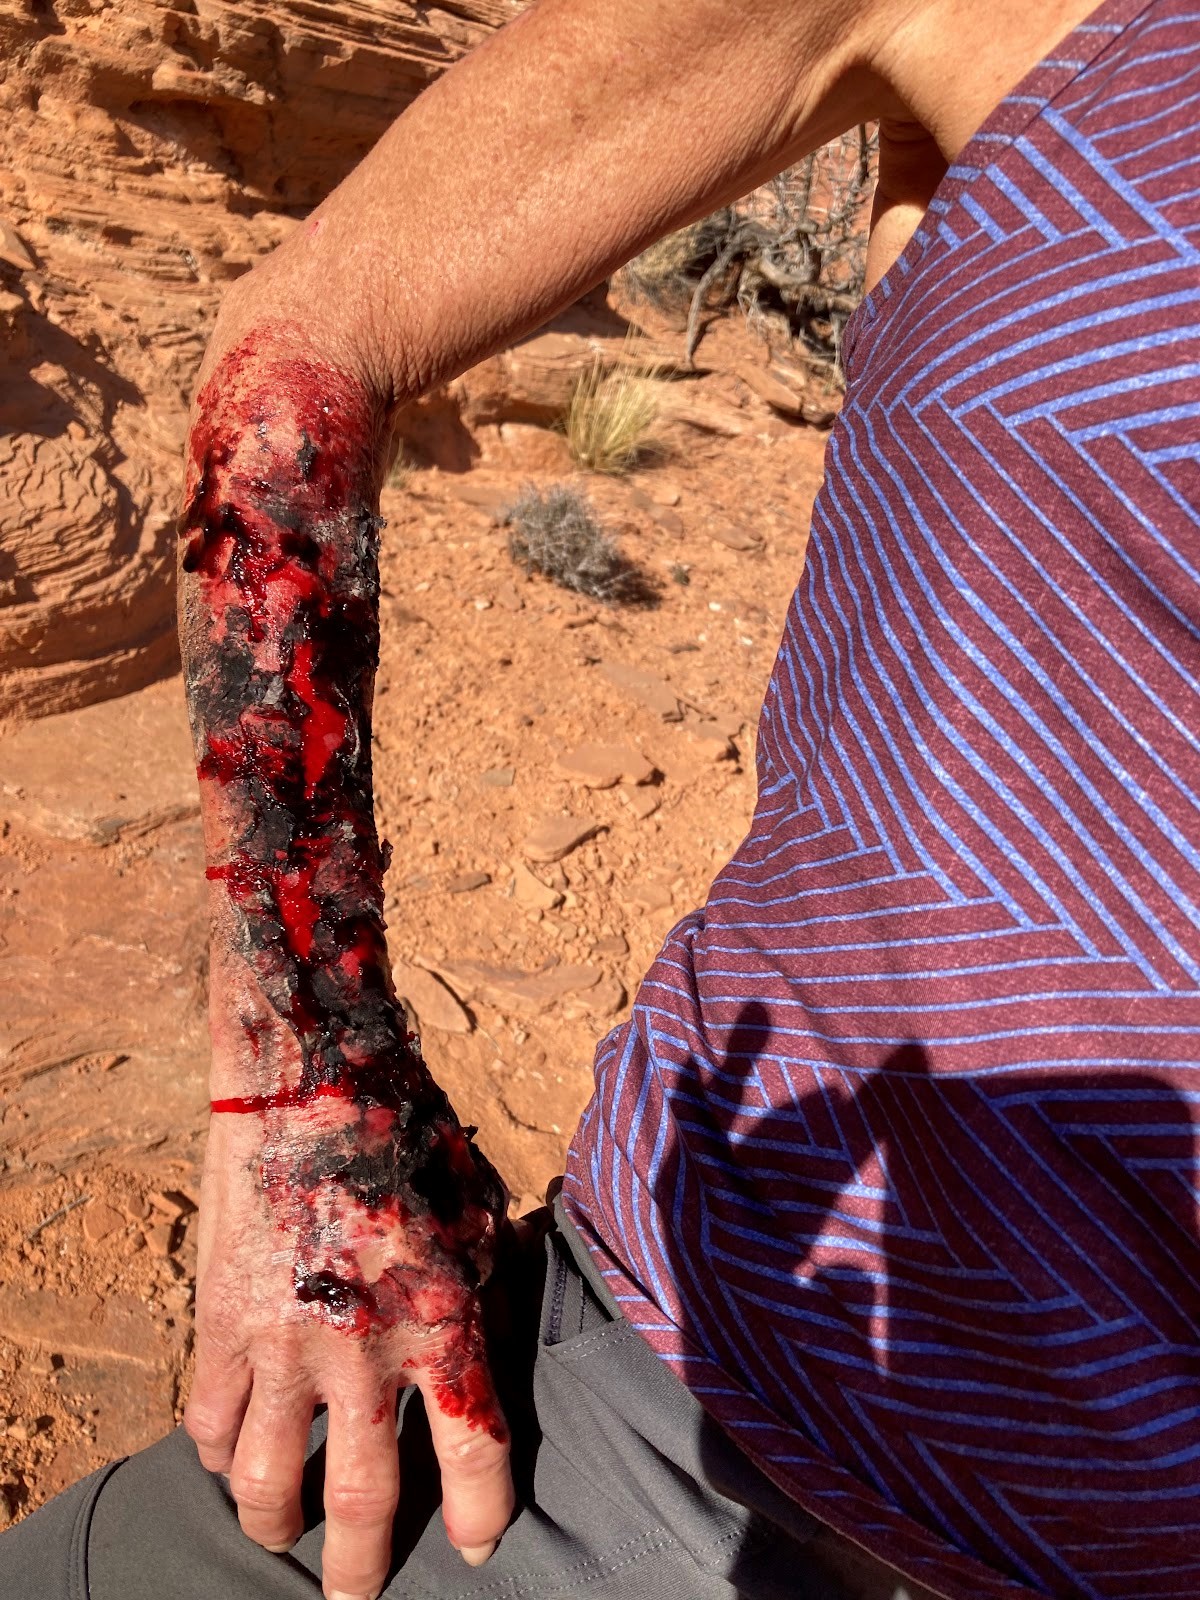
Full thickness burns to forearm. (Photo: Teal Harbin)
- Outline the burn area with a black stencil.
- Blacken any areas that you will not be putting liquid latex over (e.g., eyes).
- Add layers of liquid latex followed by pieces of individual torn tissue paper.
- Continue to add liquid latex and tissue until the area is covered.
- Use coverup (makeup) to match the subject’s skin tone, and blend the edges.
- Once dry, use black makeup to color in the craters of the burnt skin to create depth and an eschar appearance.
- Add in other burn colors (deep reds).
- Apply blood gel by stippling with a sponge.
Hand injuries

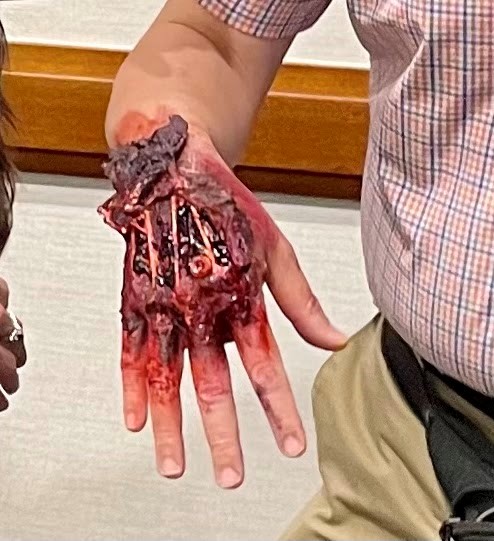
Complex hand injury using Q-tips for simulated tendons. (Lara Phillips)
- Apply modeling wax to create a border of the hand wound.
- Add layers of liquid latex with a triangular sponge (4-7 layers is ideal) and let dry.
- Peel back a layer to look like avulsed skin.
- Apply makeup to add deep red and black at the base of the wound.
- Remove the cotton from Q-tips and cut them to size to simulate the tendons of the hand.
- Adhere the Q-tips to the skin with liquid latex or skin adhesive.
- Cover the ends of the Q-tips using modeling wax and liquid latex.
- Blend the edges of the wound to the subject’s skin tone with makeup.
- Apply deep red makeup to the edges of the wound.
- Apply blood gel by stippling with a sponge.
Additional Resources:
Teal and Lara highly recommend checking out YouTube and other online sites for a variety of different tutorials. Here are some of their favorites:
Intro to Moulage for Healthcare Workers developed by BreckWild student, Molly Basilio, featuring tutorials on several types of wounds including gunshot wounds, large lacerations, and open fractures
Base Medical tutorial on realistic, full thickness burns simulations
Base Medical resource page on moulage materials and tutorials on other injuries such as frostbite, sucking chest wounds, and others